Sunday, October 22, 2017

South Padre Photo Session

Our family took a little short trip to South Padre several weekends ago & literally like the day before I booked a little family photo sess on a whim.  I was wanting so badly our fall photos taken for Christmas pictures but our beloved photographer moved to Louisiana.  And while it just so happen she was in East Texas that week & doing mini sessions I just couldn't seem to make it work with our busy schedule so I decided to attempt to find someone to do them while down there. I searched online, Instagram & finally on Facebook ran across To The Sea Photography.  I messaged her that day & I don't know how I got so lucky but SHE SAID YES!!!!!

Now I've been to South Padre before, BUT, it was my freshman year of college so I can't say that I remember a ton of it. And definitely not any spots to have family photos b/c I can bet that was the last thing I was looking for when I was there then. HA!  So basically I had no idea WHERE to do them. It also didn't help that hurricane I don't remember which blowing in so the tide was up & the waves were fierce.  Like huge, people surfing, in Texas. Who would've thought lol.  Anyway I literally changed my mind on location, oh ya know probably 6x or so.  And she just went with it.

When it finally time for the session we met her down at the convention center b/c my brother in law had found some awesome dunes just down the island so that was the final destination and my goodness was it beautiful.  My two year is less than accommodating these days but she just went with the flow, never bother.  So all that to say if you are ever in South Padre, DO look her up & DO yourself a favor & book your family photos with her b/c OMG mine were gorgeous.  Check out her website https://www.totheseaphotos.com/2017/10/12/colors-of-sunset/

And check out a few of my favorites from our session. Looooooove my little family to the moon & back.


XOXO,
The Martin's

Estate Sale: Antique Buffet/Sideboard Chalk Paint Makeover


Yall I have been searching long & hard for an antique buffet/sideboard. Call it whatever you want but I finally found one. THANKS to an Estate Sale on Old Bullard.  Granted its been setting in my garage awaiting for its sand down and fresh coat of chalk paint but what a better day than this afternoon for that to FINALLY happen. Say hello to my long awaited antique buffet. Oh how I love thee.


I chose Annie Sloan Chalk Paint just b/c that's what I'm used to using, it works great for me & its not let me down thus far.  There's lots of other options out there so use whatever your heart desires.


As you can see if had something I'm not even sure what it is built up on it. It looked years of wax or polish build up to me but who knows what it really is/was.  I sanded it off so it is no longer there.


I also had a little helper through the first part of this.  He wasn't feeling that great today but he wasn't bothering me either & it was less whining while we were outside so we just went with it until naptime.


So I started this project by sanding down the buffet & then blowing it off with the air compressor for any loose dust, followed by a good wipe down with a wet rag. Once finished it looked like the following below & was ready for the chalk paint.  As I already mentioned, I chose Annie Sloan Chalk Paint, in Old White. It has become my favorite.


I was mainly just trying to get the grime or whatever that was off before I began to paint.  Next I began to paint & got a solid two coats on before it was time to go in & give the boys a bath. So stay tuned & hopefully I will get updated pics on tomorrow, assuming I have time to finish it. MAJOR IF!!!! But hey a girl can dream right?!  I'm much to anxious to see the finished product so I might just make time.


After removing all the hardware I read somewhere that if it were brass you could soak it in fresh lemon juice.  Now granted I was fresh out of lemons, I did have lemon juice so I figured what the heck. It said to soak it for an hour & then use salt as a light scrub. Man the gunk that came off of those things was pretty amazing yet a little gross. But hey it worked! Unfortunately I forgot to take an after picture to show you just how well it worked but believe you me it did tremendously.


After two full coats of chalk paints I went back & distressed it with my sander.  I then proceeded to stain it with the dark wax as pictured above in every crease, nook or cranny.  It still wasn't enough for me so I took a fine tip paint brush & went over all the fine detail on creases on the front & then wiped it off with a old tshirt.  And I finally liked it!  And moved it into my dining room.


I'm kinda smitten.  The dining room has officially become my favorite room in the house just so I can sit in here & stare at it. 


Tuesday, October 3, 2017

Buffet Makeover with Annie Sloan Chalk Paint

This is what the Buffet looked like BEFORE!  Let me just say that I had been on the hunt for a tv console to get rid of that awful glass/metal man tv stand that some yahoo sold my husband way back when he didn't know any better at the tv store to sit his huge tv on.  My girlfriend was having a moving/garage sale & had posted it on facebook & there sat this little gem. I was like SOLD!!!!


Material needed for this project are the following:
- Annie Sloan Chalk Paint (or any chalk paint of your preference) I used Old White as my color.
- Annie Sloan Soft Wax, I used Clear & Dark wax. (Again preference, use whatever your heart desires.
- Paint brushes
- Paint Rags (old t-shirt also works great)
- Sander
- Screw driver or flat head to remove hardware


I began by removing all the hardware & then sanding the clear coat off as much as possible. 


Once all the hardware had been removed & buffet had been sanded you will want to wipe it down with a wet rag to remove any dust.  I also gave mine a good spray with the air compressor just in case I missed anything.  Next I began applying the Old White Chalk Paint until the entire buffet was painted.  Next part is the hardest part of it all. LET IT DRY!!!! Nothing I hate worse than waiting for paint to dry. Geez who has time for that.  I need to get on to the next project. Lets get this show on the road. Finally! Its dry! I guess I didn't get a picture of it after it was all painted but clearly you know it was all white.  Because I'm anxious like that I went ahead & put all my hardware back on so I could see the what it looked like and/or if I would want to reuse the hardware that it came with or replace it.  I opted to reuse the original hardware. 

Now you can either stop here & apply your wax if you like how it looks or keep going.  The next part I know stresses some people out b/c they are like what if I screw it up or don't like it. Umm...tough? I can't make that decision for you. I however knew the look I was going for so I proceeded.  And out came the sander.  I scuffed up the sides, the center, the top, the edges, you name it. After scuffing to your hearts desire, again wipe it down with a wet rag & blow it off with the air compressor. (Not necessarily in that order) Then I applied the dark wax.  It kinda gives it an aged look maybe even sorta dirty to some people. But I like it.  Let the wax set & in a day or so go over it again with the clear wax which is going to give it that smooth finish.

(You might want to note also that the dark wax goes on pretty heavy & dark. So you might want to try it on a practice board or in a spot that won't be seen much on the actual buffet to see if you like it & want to continue. If it's too heavy, you might try doing the clear coat of wax first & then coming back & doing the dark wax over it as it doesn't go on so dark & you're in a little more control.)


Back to School Teacher Gifts 🍎✏️🖍📚

I have actually done these as Back to School Teacher Gifts the last two years.  We have a store here in Tyler called Cookies by Design. http://cookiesbydesign.com/ For the past two years they have had back to school themed cookies, including apples, either on a stick or without the stick.  And bonus, they come prepackaged individually.  (Yay one less thing you have to do)

Anyway, I grab several. One for both his in class teachers & two more, one for the Headmaster & one for the Office Assistant b/c lets face it. Some days he spends a little time in the office with the Headmaster mastering how he can make better choices.  Its a good thing they love him.


Items needed:
- Cookies of your choice (I used Apples)
- Raffia or Ribbon of your choice
- Scissors
- Single Hole Puncher
- Apple Template printed in color - I went to the internet & googled free apple template & then copied & pasted about 6 of these to a blank document.  (I attempted to provide you with my original template that I made but little fingers got ahold of my last computer & I lost everything & therefore don't have anything on this new computer)  Be sure to size them to the size you prefer. You can either print them in color & write on them with a black marker or you can insert a text box over the apple to say what you would prefer & then print them.  Once printed I just cut them out with scissors.  Just note: that if you print them on a heavy cardstock you can just use the apple alone as your greeting card.  B/c I printed mine on regular copy paper I then had to come back with a thicker cardstock & glue the apple to the cardstock so that it'd be a bit thicker & be able to withstand little fingers.


Hey, they turned out pretty cute though right?!


Monday, July 7, 2014

Black Distressed Bathroom Cabinets Tutorial

For the love of cabinets! These hideous 80's golden yellow orange cabinets I have longed to see disappear are finally actually making me smile. 

I forgot to take a before picture but they all look the same & are quite similar to this picture. Those knobs have to be antiques by now right?!


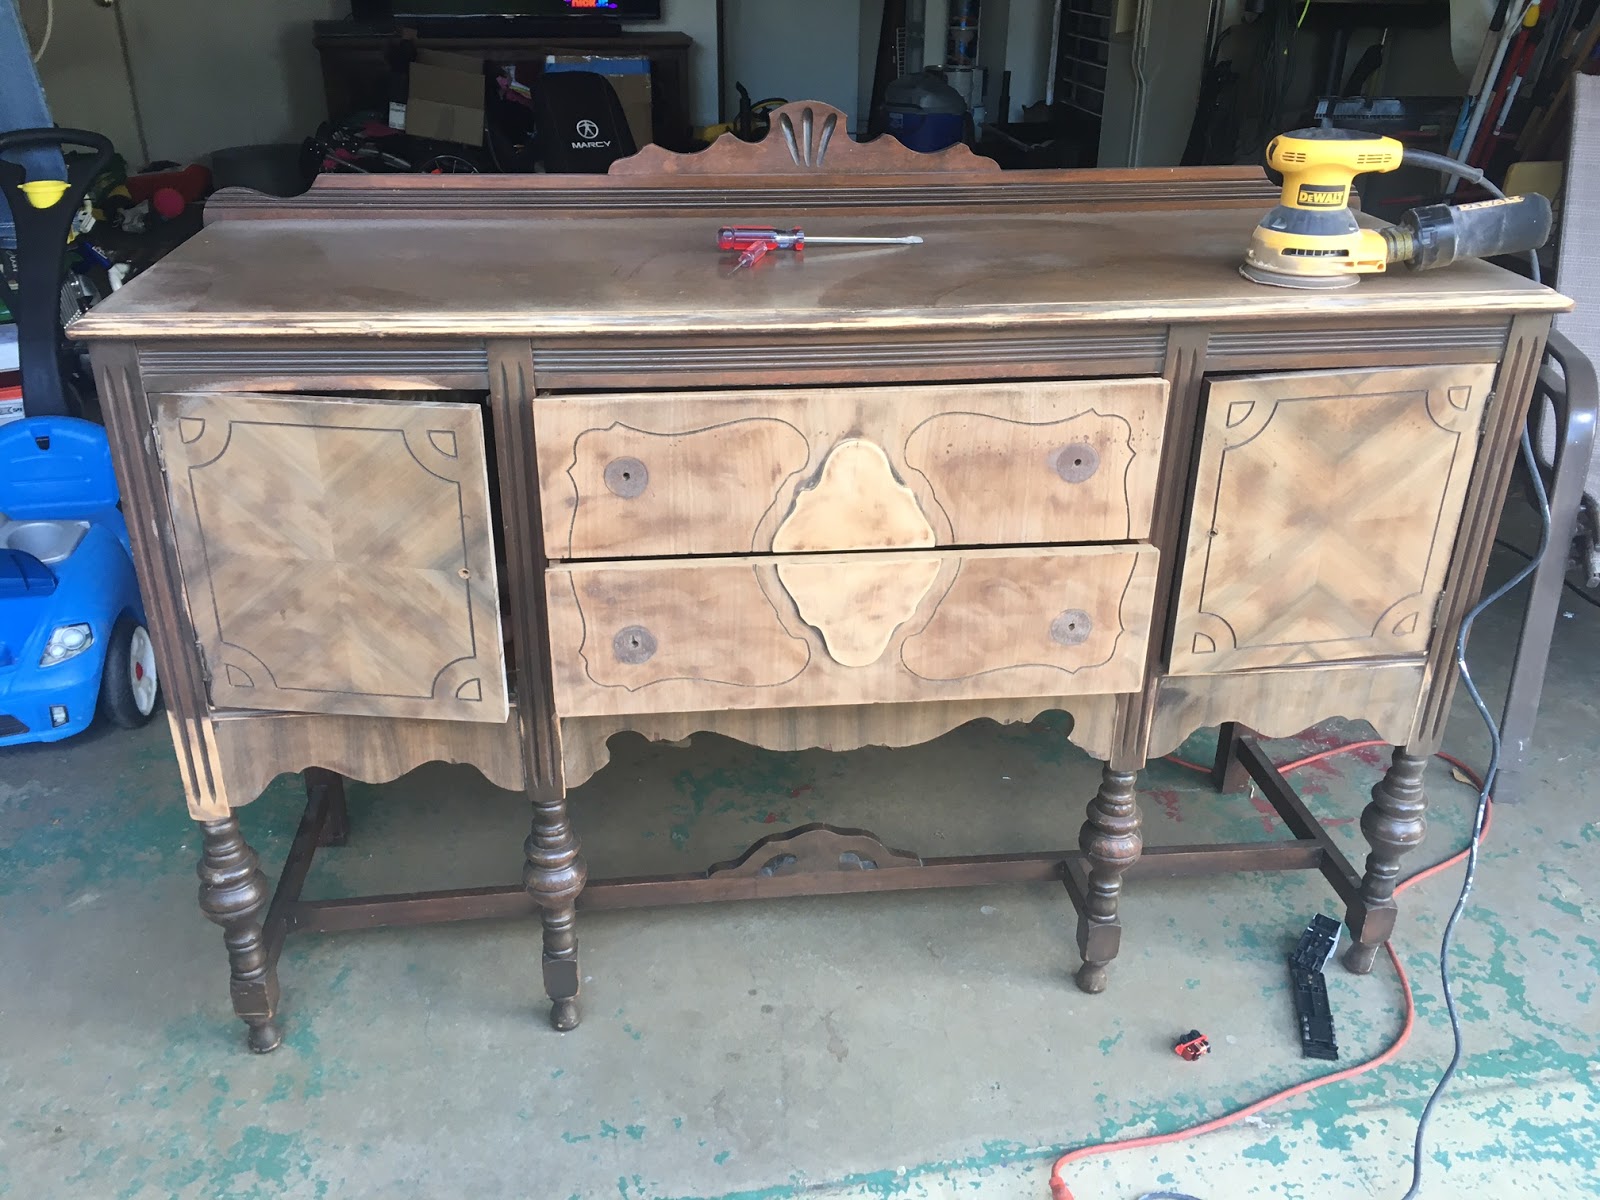
So first wipe down your cabinets of any dust, dirt or grime. Take doors off the hinges by unscrewing them with your electric drill. Remove all hardware. 

Next up your going to sand all cabinet doors front & back & the cabinet facing. Basically you're trying sand the shine off. You don't have to sand all the way down below the stain. I used this hand held DeWalt sander that was purchased at Lowe's.


After doors & facing are sanded. Be sure to wipe them clean of any dust, dirt or particles you wouldn't want mixed in with your paint. 

Next you're going to prime your cabinets doors & facing with a primer. I used Zinsser Cover Stain, Primer Stain Blocker. Purchased at Lowe's. I only used one coat but depending on what you're covering just use your best judgement. 


So I primed everything up & went to bed. Will start again tomorrow morning.

Finally the paint. Here is comes but first off be sure to mask everything off with painters tape don't want anything bleeding through. 

Paint I used satin interior Valspar Signature Paint + Primer in Cracked Pepper which is the darkest black lowes carries so said the paint guy.


I used a this roller as well as a paint brush for the grooves. 


The cabinet door behind this roller is what the door looks like before you sand it. 

So granted I am doing this in the heat of the day during the good ole Texas Summer which means it's blazing hott outside everything drys a little quicker.

I painted the first coat of black on all the doors outside in my garage, went in to paint the facing & by the time I came back out that side was dry enough that I could flip it & paint the other side. I waited 4 hours before adding a second coat. Then let all the painted cabinet doors & facing dry for 24 hours before I began sanding on Monday evening when I got home from work. Only got one cabinet door accomplished this evening b/c my husband had a golf tournament which meant I had to entertain our two year old whom is highly allergic to Mosquitos yet they love to feast on him in the evenings so we refrained from outside, but I am highly pleased with how it turned out.


This is the sanding block I used to distress my cabinet to perfection. Ha! It's only to my satisfaction whereas everyone's is different so just sand to your hearts desire. You do however want to make sure you sand past the primer though. 


Ok this is as far as I got today b/c Mr. Case as always trumphs any & everything so until tomorrow.....Goodnight!!

7/13/14   8:23pm

Good evening all, finally got around to finishing up my cabinets this evening. They turned out even better than I ever imagined. 


I did end up going over them after I was finished sanding with a Minwax wipe on poly in a clear satin finish.


Let poly dry for 24 hours. Put all your hardware back on & hang the doors & viola....stare in amazement for hours & smile every time you flip the light on....I do. =)

Thanks!
Let me know if I can help.


^^^^great picture to see the two side by side as before & after painted. Awesome huh.